ReactNative - Redux

기존 MVC 패턴의 문제점
기존의 MVC 패턴 state 변경 흐름
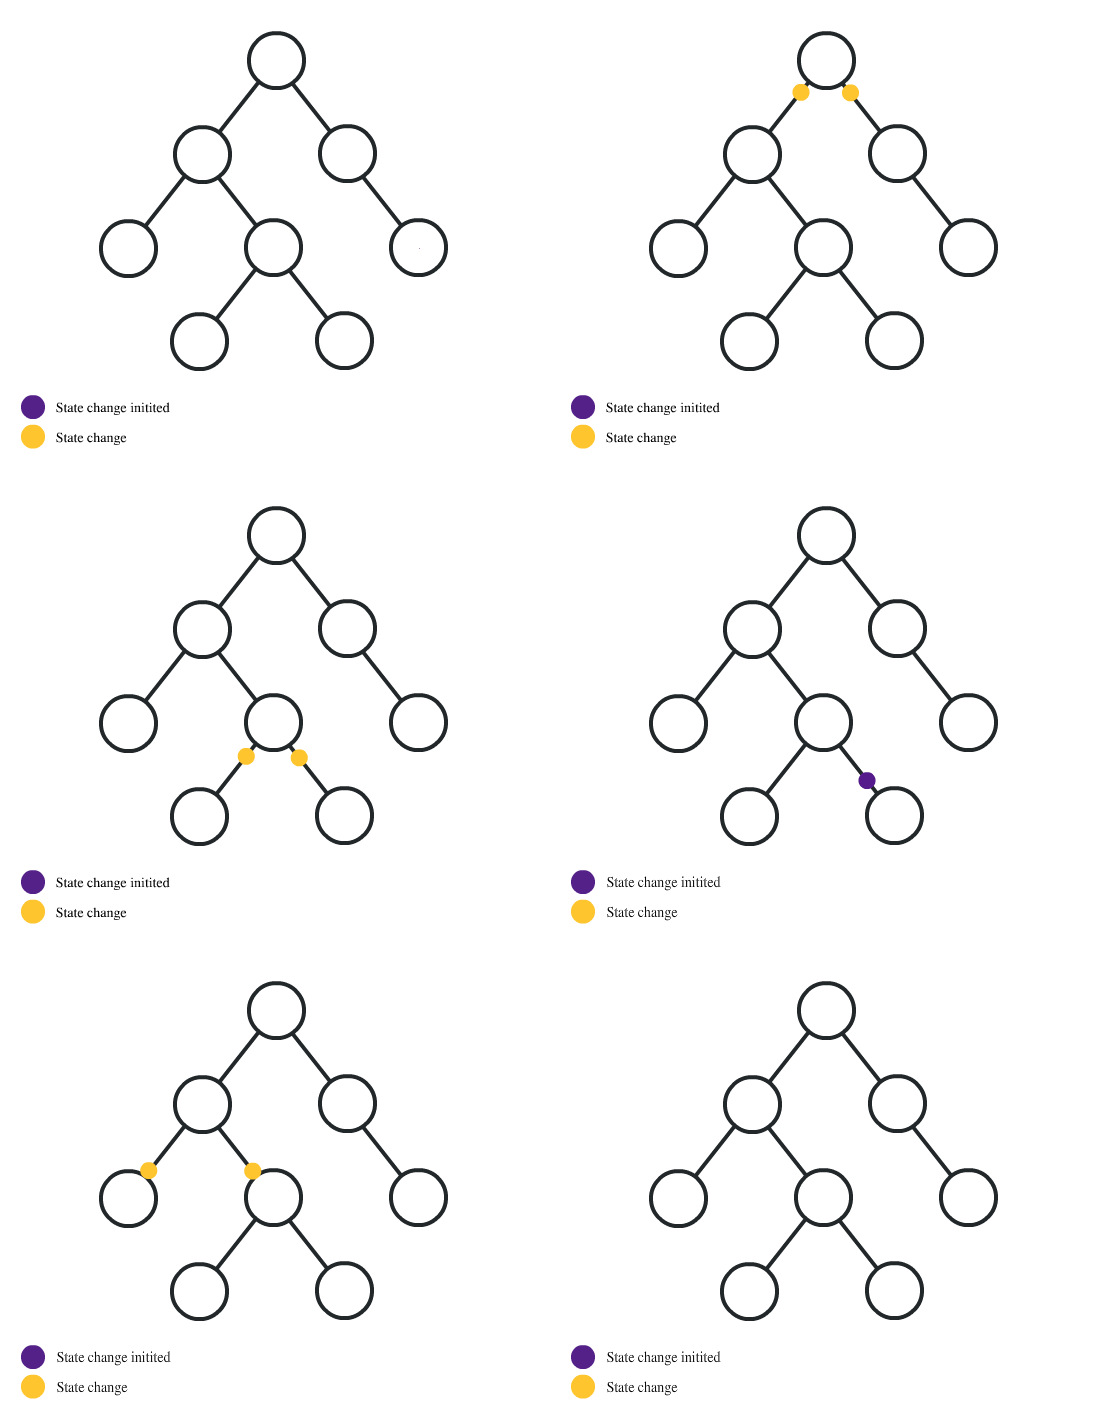
MVC 패턴에서 양방향 데이터 흐름이 발생하면 데이터 변환 작업과 유효성 검사를 위해 추가적인 코드 작업이 필요하며, 뷰와 컨트롤러 간의 데이터 전달 과정에서도 문제가 발생할 수 있습니다.
이는 코드의 복잡도를 증가시키고 유지보수를 어렵게 만들 수 있습니다.
Redux
MVC 양방향 데이터 흐름의 문제를 해결하기 위해 등장한 Flux 아키텍처. Flux 아키텍처는 단방향 데이터 흐름을 강조하며, 상태(state)를 중심으로 구성됨. 이를 구현하기 위해 Redux 라이브러리가 등장. 이로인해 중앙 집중화된 관리 및 상태 예측이 용이해짐.
Redux는 단방향 데이터 흐름(unidirectional data flow)을 따름.
액션(action) → 리듀서(reducer) → 상태(state) → 뷰(view)
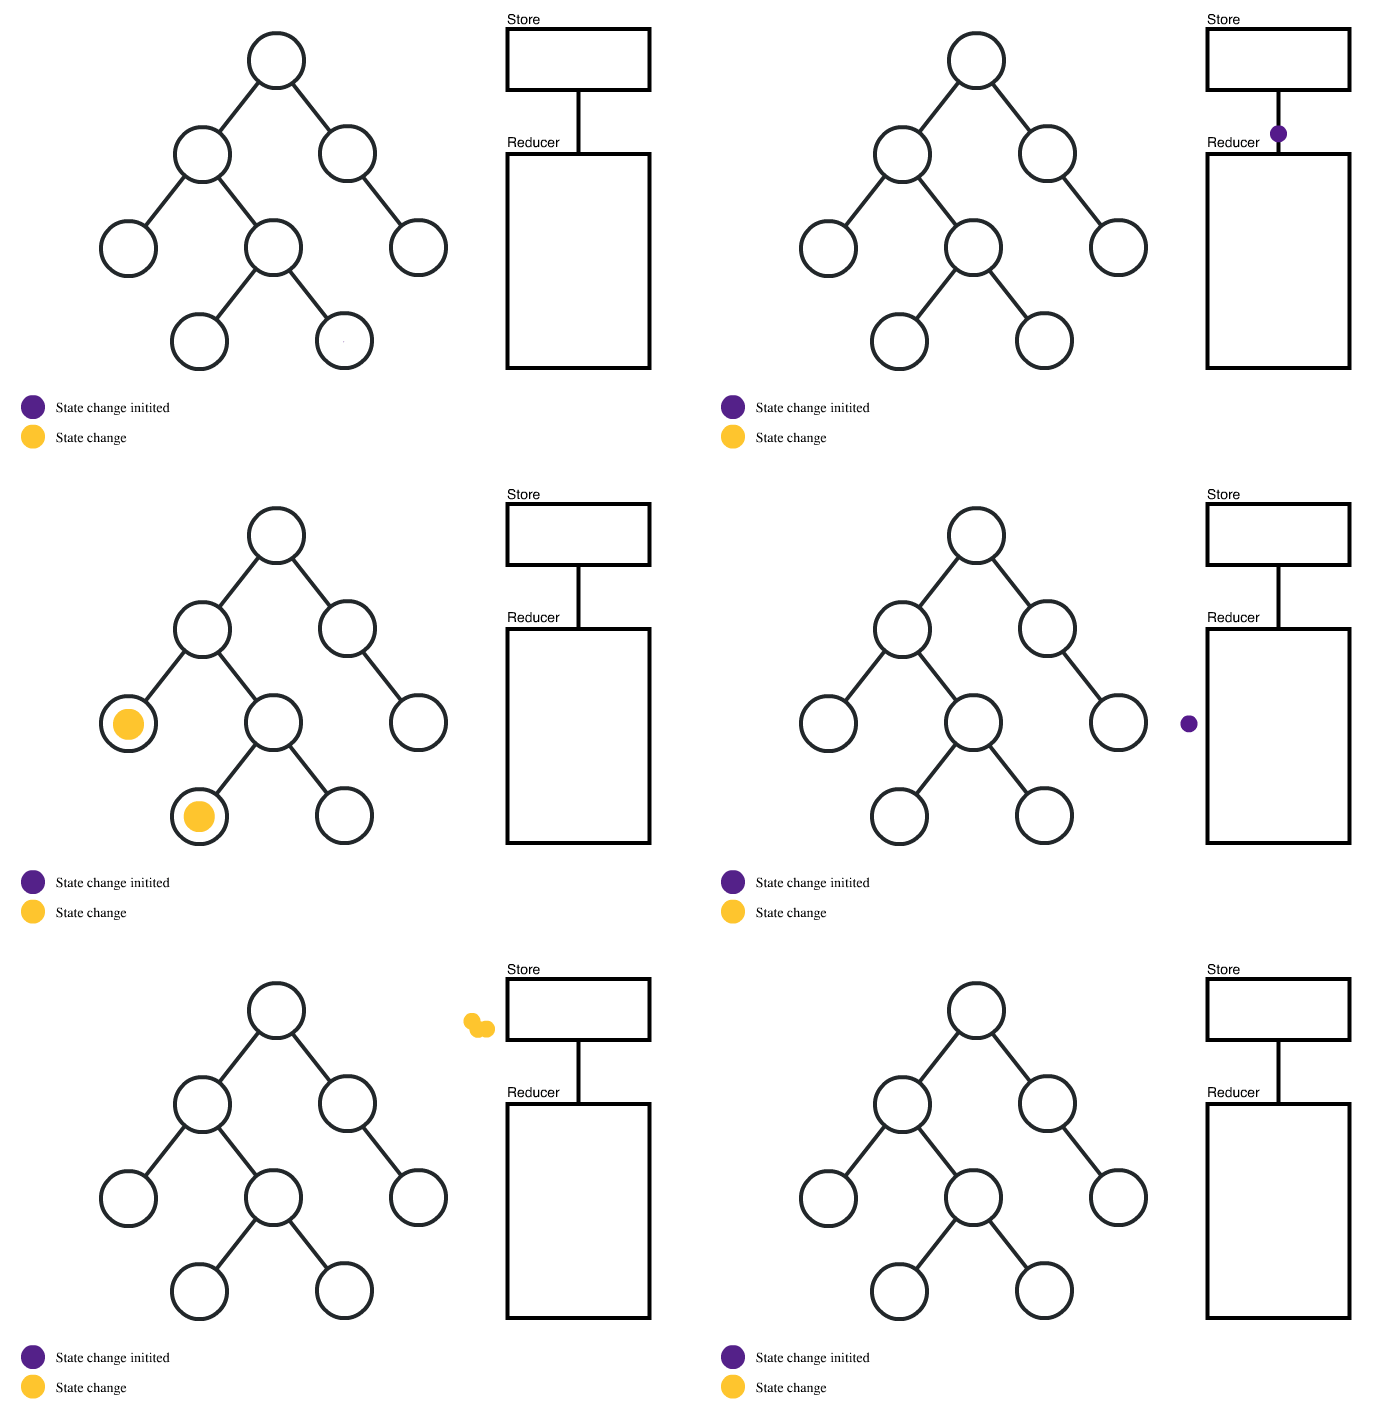
Redux 예제
store
store는 Redux의 핵심 개념 중 하나로, 앱 전체의 상태를 담고 있는 단일 객체. 앱의 모든 컴포넌트에서 상태에 접근하고, 상태를 업데이트할 수 있도록 중앙 집중적으로 관리.
import { configureStore } from '@reduxjs/toolkit';
import { TypedUseSelectorHook, useDispatch, useSelector } from 'react-redux';
import {counterSlice} from './counterSlice';

export const store = configureStore({
  reducer: {
    counter: counterSlice.reducer,
  },
});

export type RootState = ReturnType<typeof store.getState>;
export type AppDispatch = typeof store.dispatch;

export const useAppDispatch = () => useDispatch<AppDispatch>();
export const useTypedSelector: TypedUseSelectorHook<RootState> = useSelector;
configureStore 함수를 사용하여 스토어를 만들고, reducer 속성으로 counterReducer를 전달. RootState와 AppDispatch 타입을 정의하고, useAppDispatch와 useTypedSelector 훅을 만들어 사용.
counterSlice는 Redux Toolkit에서 제공하는 createSlice 함수를 사용하여 만들 수 있습니다. TypeScript에서 사용하기 위해 slice의 타입도 함께 정의.
counterSlice
slice는 Redux Toolkit에서 제공하는 기능 중 하나로, Redux 앱의 일부 데이터와 그 데이터를 업데이트하기 위한 reducer 함수를 포함하는 Redux 모듈을 간단하게 만들어주는 도구.
Redux 상태를 감싸는 namespace를 제공하여, 다른 slice나 상태와 충돌하지 않는 안전한 상태 관리를 할 수 있도록 함.
import { createSlice, PayloadAction } from '@reduxjs/toolkit';

interface CounterState {
  value: number;
}

const initialState: CounterState = { value: 0 };

export const counterSlice = createSlice({
  name: 'counter',
  initialState,
  reducers: {
    increment: (state) => {
      state.value += 1;
    },
    decrement: (state) => {
      state.value -= 1;
    },
    incrementByAmount: (state, action: PayloadAction<number>) => {
      state.value += action.payload;
    },
  },
});

export const { increment, decrement, incrementByAmount } = counterSlice.actions;
export type CounterSliceType = ReturnType<typeof counterSlice.reducer>;
createSlice 함수를 사용하여 counterSlice라는 슬라이스를 만들고, reducers 속성으로 increment, decrement, incrementByAmount 액션을 정의. CounterState와 PayloadAction은 TypeScript 타입을 정의하기 위한 인터페이스.
마지막으로, CounterScreen 컴포넌트에서 useAppDispatch와 useTypedSelector 훅을 사용하여 스토어를 사용.
CounterScreen
import React from 'react';
import { Text, TouchableOpacity, View } from 'react-native';
import { useAppDispatch, useTypedSelector } from './store';
import { increment, decrement } from './counterSlice';

export default function CounterScreen() {
  const dispatch = useAppDispatch();
  const counter = useTypedSelector((state) => state.counter.value);

  return (
    <View>
      <Text>Counter: {counter}</Text>
      <TouchableOpacity onPress={() => dispatch(increment())}>
        <Text>Increment</Text>
      </TouchableOpacity>
      <TouchableOpacity onPress={() => dispatch(decrement())}>
        <Text>Decrement</Text>
      </TouchableOpacity>
    </View>
  );
}
useAppDispatch와 useTypedSelector hook을 사용하여 dispatch 함수와 counter 값을 가져옵니다.
그리고 버튼을 눌러 액션을 디스패치합니다.
바라봄에 대해 더 알아보고 싶다면?
| 홈페이지 | 안드로이드 | iOS | |
|---|---|---|---|
| 바라봄 | barabom.me | Play Store | App Store |
개발자와 소통해요!
| 인스타그램 | 쓰레드 | |
|---|---|---|
| 🙋♂️ | @right_hot | @right_hot |